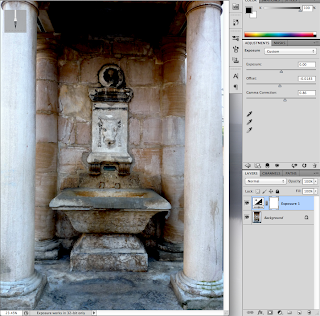
Below are a couple images of the UI for Exposure:
Now lets begin editing out image. The process is fairly painless. However, notice that the "Offset", which I consider to be the "gem" of this layer, has 4 significant figures after the decimal. This is because we only use a VERY little amount of this, it's quite potent. Here is our image before Offset:
And after:
2. Now using the Gamma Correction slider, lets fix some of those colors:
3. And you're Done! Play around with these effects more, it's one of the mist powerful layers in photoshop and can increase depth quickly, cleanly, and consistently. Here's a picture of what can happen if you drag the slider to the left, to increase high lights, which on this image, make it look too washed out, so beware of the power of this tool.


No comments:
Post a Comment